How To Tell If Your Makeup Has Expired

Unfortunately, just like food, makeup has an expiration date and most of the makeup that we hoard will expire before we have a chance to use it all.
I know what you’re thinking: it doesn’t matter of my makeup has expired, “I’m still going to use it”! As well as the product not working the way that it should, it could actually be dangerous and cause irritation, breakouts, swelling, and dermatitis.
PAO SYMBOL (PERIOD AFTER OPENING)

The easiest way to tell if a product has expired is to check the expiration date.
Look for the PAO symbol (Period after opening) on your packaging, which indicates how long it’s safe to keep the products once you open them.


When I open a new product, I use an ultra fine sharpie marker and write the date of opening on the back. This way I can easily check if my product needs to be thrown away.

If you are more into tech and want an app for your phone, Apple have an app called ‘Makeup Expiration App – Countdown Timer ‘
I use this app when ever I add a new product to my makeup kit or to my personal makeup bag. I must admit that it took a long time to add all of the products and I nearly gave up however I have an extensive makeup kit for professional use. If Id kept the app just for my personal use it would have been much easier!!!
I don’t know when I opened my products?
If you have a bag full of makeup and skincare but haven’t yet started to note the opening dates, there are plenty of ways to determine if your product has expired without knowing the expiration date. All it takes is a bit of common sense and a quick check of your products.
My general rule is “If your product doesn’t look or smell right, then it probably isn’t”
Here are a few ways to check whether your makeup is still OK to use without knowing when you opened it:
SMELL

We all know what the scent of new makeup smells like. So if your makeup smells off, like chemicals just smells bad then do the same as you would with food and throw it away.
COLOUR

One of the tell-tale signs that your makeup has expired is if the colour has changed. If you’ve noticed that your makeup has oxidised to a different colour than it was when you purchased it, then it’s time to throw it out. Products such as creams and foundations without a pump are more prone to oxidisation, but all makeup and skincare products will eventually oxidise and grow bacteria. Remember that you’re not saving money by keeping an ‘off’ product as you’ll have to spend more on skincare to rectify the problems that the product causes!
TEXTURE

For example, cream products are meant to be creamy. If you’ve noticed a product applying poorly or unevenly, it’s texture may be off.
Another example of texture changing is if a product splits. This happens a lot with foundations, sunscreen and skincare products. If you shake the bottle and the product doesn’t come back together then it has definitely ‘gone off’ and its time to throw that product in the bin.
One more common texture product with makeup and skincare if clumping/clumps in the product. Liquid makeup products such as creams, foundations and mascaras aren’t supposed to be clumpy. If you’re noticing any bumps or lumps in your products, then make sure to toss them. Clumps can be a sign of bacterial growth.
HARD OR CHALKY LAYER

Unfortunately, powder makeup products are subject to expiration dates as well. A tell-tale sign that your powders need to be replaced is if a film or chalky layer has developed over the product. Another sign of your powder products expiring is if you get a hard layer over the top of your powder and you cannot therefore pick up any powder on your brush. Both of these signs mean that it’s time to throw that product away and treat yourself to a new one.
WHITE SPOTS

If you’re eyeliners or lip pencils begin to develop a white spot on their tip that can’t be sharpened off, then the product as expired. This is a sign of bacteria and the product should be thrown away immediately.
Cleaning your Makeup Products
How long your makeup lasts also depends on how you treat it.
Always avoid touching your makeup with your fingers, whenever you can. If you must use your fingers, use an antibacterial gel before you dip those digits into your favourite product.
If possible, look for products with a pump so that you can avoid exposing it to outside elements. Many brands sell pumps that fit onto all of their products such as foundations and this by far, is the most hygienic way to use creams/liquids.
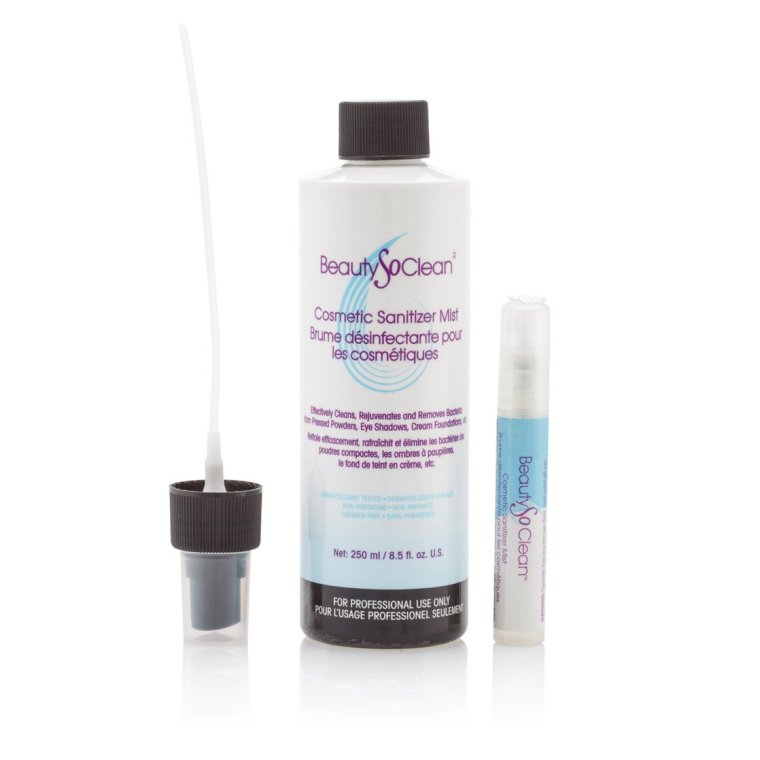
Sanitise your products like a Makeup Artist. There are many sanitisation products out there, but I only use Isopropyl Alcohol 70% and Beauty So Clean. Sanitising your products after each use helps to preserve the shelf life of your products by reducing bacterial growth.

I mist Beauty So Clean over my powder products

and spray Isopropyl Alcohol 70% (Medical Grade Antiseptic Disinfectant ) onto my lip and cream eyeshadow palettes and gel products.
If you have bullet lipsticks and not palettes, then just fill an egg cup with the alcohol and dip your lipstick straight into it. (You must use 70% isopropyl alcohol as anything higher will evaporate too quickly and therefore won’t sanitise your products and you must let the alcohol evaporate before you close the lid on your clean products)
The two products I purchase are:
Harley Street Care Isopropyl Rubbing Alcohol 70% 500ml, £5.65 Amazon
Beauty So Clean 120ml, £18.60 Amazon

Storing your products in a cool, dry place will also prolong the life of your makeup and skincare. I’m not saying that you need to go out and purchase a skincare fridge, although they are cute, but don’t leave your skincare on the windowsill to get hot in the sun, and keep your makeup in a drawer or makeup bag in a cool part of your room, not next to a radiator etc.
While it may be hard to part with your makeup, it’s worth it in the long run. It’s not worth contracting bacterial infections like Katie Wright who contracted Cellulitis from a dirty makeup brush. Read the full article here.
If you want to find out more information on cleaning your makeup brushes, read my blog post: How to Clean Your Makeup Brushes without damaging them.
As with all my blog posts this is my opinion and is not sponsored or paid by any brand and none of the links are affiliates.
Follow my blog for more tips and tutorials on makeup, hair and beauty. If you have any ideas on what you want me to write about or give tutorials on, please post a comment
If you liked this post, please share with friends and family on Social Media/email.
Thank you for reading 💋
Claire xx
